To watermark a photo, PDF, or another document, you can use DocuFreezer. With it, it's possible to add one or several digital watermarks to all files added to the program's List of files, and you don't need to put each watermark separately. You can specify the page or range of pages on which each watermark appears.
How to add a watermark to multiple documents step by step
As of version 3.2 or newer, DocuFreezer features convenient menus for managing watermarks. Different options are available depending on whether you are applying a text or image watermark.
To watermark one or multiple files:
- Add all the necessary files to DocuFreezer
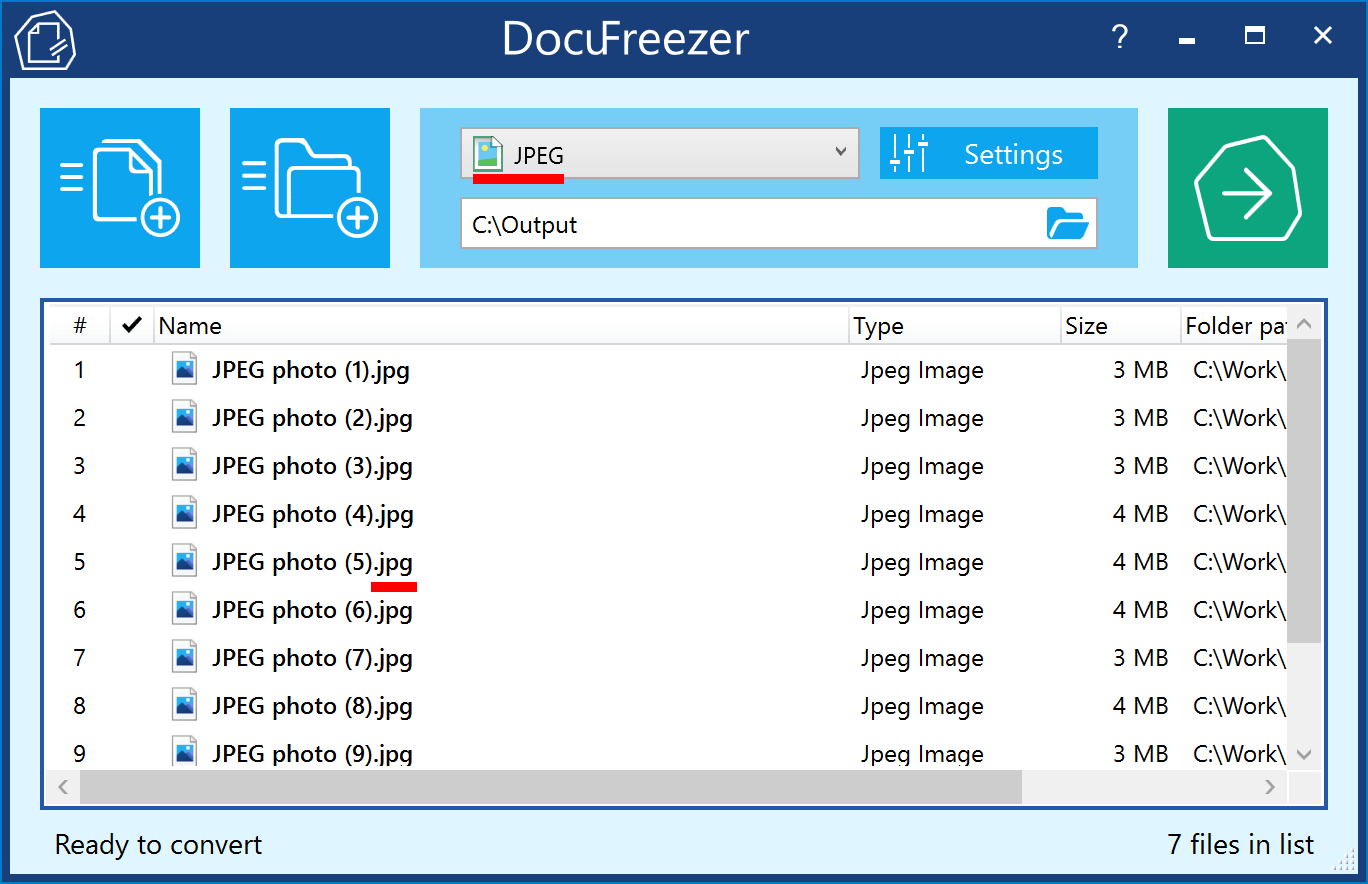
- Select output format (you can keep it the same if there's no need to change it)
- Go to Settings → Edit operations
- Add either Image watermark or Text watermark (or both) and configure it
- (If you put several overlapping watermarks) Move watermarks up or down in relation to each other to set up their vertical position (Z-order) in the Edit operations top menu
- Click OK and click the Start button

 What is a watermark?
Text watermark
In DocuFreezer, you can create your own text watermark and adjust its position on a photo or document pages.

| Setting or interface element | Functionality |
|---|---|
| Font style | Select font typeface, size, and attributes like bold, italic, underlined, color |
| Macro | Open the macro menu. Allows you to use data from source files, such as file name, file creation date, location, and others |
| Text field | Enter arbitrary text and/or add macros. The default macro {srcfilepageno} adds source page numbers |
| Alignment | Set the X- and Y-axis position (Left, Right, Down, Up, Center) |
| Offset | Set the X and Y offset values as a percentage of the document height/width. You can enter positive or negative values. |
| Rotation | Set watermark rotation in degrees |
| Background | Set the background filling color from a preset or with a code |
| Z-Order | Place the watermark either in front of or behind the document content by selecting In the foreground or In the background |
| Page range | Set specific pages or page ranges where you want to apply the watermark. Enter page numbers and/or page ranges separated by commas counting from the start of the document. For example: 1-5,10,20-25. To define pages from the end of the document, use the syntax "last" (last, last1 for the penultimate page, etc.). For example: 1,5-last3,last2,last1,last You may also select odd or even pages only. To do so, use the setting Page range selection: Odd or Even. |
 PDF text annotation: a faster method to insert text into output PDF files
For adding text to output PDF files, we recommend using the PDF text annotation operation instead of the Text watermark.
This method allows you to insert text into multiple PDF files quickly and efficiently, whether your source files' format is PDF or any other supported format. It's faster because it doesn't require re-rendering document pages or altering the document structure. The PDF text annotation operation offers the same parameters as the Text watermark and functions similarly.

Description of all macros
A macro in DocuFreezer is a name given to certain value or expression used to add data from the source file's metadata, such as the filename or file path, file attributes (e.g., creation date and time), or some other information like the computer's or user's name.
The default value for the Text watermark is {SrcFilePageNo}, which adds the source file's page number. However, you can use other macros and combine them according to your preferences.
You can access all macros through the Macro button or enter them manually. The macro name will turn light green if entered correctly.
Note: macro names are not case-sensitive. That means, both {srcfileext} and {SrcFileExt} will work the same way. Macros may be used with an asterisk character in the beginning (for example, {*SrcFilename} or {*SrcFileFullPath}), which can help prevent using incorrectly entered macros.
| Macro name | Macro | Description |
|---|---|---|
| Filename | ||
| Source file name | {SrcFileName} | File name (without file extension). Example: Document_A |
| Regular expression of source file name | {SrcFileName("^(\d+)")}, {SrcFileName("(\d+)$")}, and more |
Various parts of the source filename:
For example, if your source files have name pattern "[File Name]-[ID Number]", you can use the Take digits from the end macro to add the ID number. Note: Regular expressions starting with "Take" will add information to the output filename, while those starting with "Cut" will remove information. For example, Cut one character removes the first symbol from the filename. |
| Source file extension | {SrcFileExt} | File extension. Example: docx |
| Source file folder | {SrcFileFolder} | Folder path where the file is located. Example: C:/Folder |
| Source file folder name | {SrcFileFolderName} | Name of a folder where the file is located. Example: Folder |
| Source file path | {SrcFileFullpath} | Full path to the source file, including the filename and file extension. Example: C:/Folder/Document.pdf |
| Source file path, 1-st part | {SrcFileFullpath(1)} | The first part of the file path (not including the drive letter). Parts are divided by slash ("/") |
| Source file path, 2-nd part | {SrcFileFullpath(2)} | The second part of the file path (not including the drive letter). Parts are divided by slash ("/") |
| Source file path, 3-rd part | {SrcFileFullpath(3)} | The third part of the file path (not including the drive letter). Parts are divided by slash ("/") |
| Source file type | {SrcFileType} | File type. For example: Microsoft Office Word |
| Container name | {ContainerName} | Name of an email message file, an archive (RAR, ZIP, 7ZIP), or a PDF Portfolio file. |
| File attributes | ||
| Source file date | {SrcFileDate} | Date of file processing by DocuFreezer |
| Source file time | {SrcFileTime} | Time of file processing by DocuFreezer |
| Source file author | {Author} | Name of the user who created the file |
| Source file creator | {Creator} | Software with which the file was created |
| Source file custom text | {CustomText} | User-specified text which can be associated with any list item using Custom settings (Custom settings column) |
| Source file pages | {SrcFilePages} | The total number of pages |
| Source file page number (numeric format) | {SrcFilePageNo} | The number of a page that is being processed. For example: 2 |
| Source file page number (text format) | {SrcFilePageNo(Words)} | The number of a page that is being processed, in text format. For example: two |
| User name | {User} | User account name in Windows |
| Computer name | {Computer} | Computer name in Windows |
| Date/Time | ||
| Full date | {Date(M-d-yyyy)} | Date containing month, day, and year. For example: 4-1-2025 |
| Year | {Date(yyyy)} | Year, for example: 2025 |
| Month | {Date(MM)} | Month, for example: 04 |
| Day | {Date(dd)} | Day, for example: 01 |
| Full time | {Time(h-mm-ss tt)} | Time, for example: 6-03-51 PM |
| Hour | {Time(HH)} | Hour, for example: 18 |
| Minute | {Time(mm)} | Minute, for example: 06 |
| Second | {Time(ss)} | Second, for example: 14 |
| Millisecond | {Time(ms)} | Millisecond, for example: 614 |
| Copies | {Copies} | File's total number of copies |
| Copy | {Copy} | Current copy number |
| Item number in the List | {ListItemNo} | Item's index number (#) in the List of files |
Creating and adding a complex watermark with multiple macros
You can include spaces, dots, or any other text before, between, or after the added macros to customize the watermark according to your needs. You may also create a multi-line watermark by pressing Enter. For example:

Adding Bates numbering to PDF pages
The Text watermark feature lets you add Bates labels with sequential numbering across multiple documents' pages. Bates numbers help you quickly identify and track documents related to specific cases or people through a common identifier.
For more information, please refer to this article:
How to Add Bates Numbering to PDF Pages and Filenames in DocuFreezer
Image watermark
If you want to insert a watermark from an image file (e.g., JPG, PNG, HTML, PDF), you should choose a file, and then customize its size and position. By default, it is added to the right-bottom corner of a page/image.

| Setting or interface element | Functionality |
|---|---|
| File selection | Browse for the file to be used as a watermark. Popular formats, such as JPG, PNG, HTML, PDF are supported |
| Alignment | Set the X- and Y-axis position (Left, Right, Down, Up, Center) |
| Offset | Set the X and Y offset values as a percentage of the document height/width. You can enter positive or negative values |
| Rotation | Set watermark rotation in degrees |
| Z-Order | Place the watermark either in front of or behind the document content by selecting In the foreground or In the background |
| Set opacity | Set the watermark opacity percentage to apply a semi-transparent watermark |
| Embed image | This setting saves the file selected as the watermark to the folder where DocuFreezer is installed. Thus, we suggest that you enable this option if you often use the same watermark, for faster processing |
| Watermark size | Select the original size (As is) or set the watermark size as a percentage of the document's page size (Percent of document size) |
| Page range | Set specific pages or page ranges where you want to apply the watermark. Enter page numbers and/or page ranges separated by commas counting from the start of the document. For example: 1-5,10,20-25. To define pages from the end of the document, use the syntax "last" (last, last1 for the penultimate page, etc.). For example: 1,5-last3,last2,last1,last You may also select odd or even pages only. To do so, use the setting Page range selection: Odd or Even. |
Barcode watermark
It is possible to put a watermark in the form of a barcode, such as QR Code or another type of barcode (including EAN, UPC, CODE 128, Data Matrix, and more). Just like with other types of watermarks, you can select the type of barcode and adjust its position along with size, rotation, and other parameters.

How to add a QR code to multiple files
QR codes have plenty of use. You can add data to your docs like payment information, tracking and ID numbers, product details, pricing, manufacturing dates, contact information — you name it.
To add a QR code to one or multiple files using DocuFreezer (this feature is available since ver. 5.0), follow these steps:
- Launch DocuFreezer on your computer;
- Click on the Add files button or drag and drop the files you want to add the QR code to into the List of files section in DocuFreezer;
- Open Settings and go to the Edit operations tab;
- Click on the Add new button and select Barcode watermark;
- Open the dropdown list to configure the watermark;
- Select QR CODE next to Type;
- Enter text in the Text field. It can be any text or a hyperlink;
- Click the Preview icon to generate a QR code. You can check it with your smartphone camera right away;
- (Optional) Customize the QR code settings as desired, such as size, position, transparency;
- Click OK to save the QR code;
- Make sure that new text appears next to the Barcode watermark operation: [QR CODE] ...]
- Click OK to save the settings;
- Back in the main DocuFreezer window, click on the Start button to begin the conversion process. DocuFreezer will now convert the files and add the QR code as a watermark;
Once the conversion is complete, you can find the converted files with the added QR code in the output location you specified.
How to apply different watermarks to different groups of files in the List
You may want to configure several different watermarks and then apply them to distinct groups of files within the List of files. DocuFreezer allows you to do so. Here's how to do it:
- In the DocuFreezer List of files, make the Custom settings column visible. This will allow you to see which settings will be applied to each item in the List. To enable it, right-click anywhere on the white space of the List of files → Show/hide columns → Custom settings;
- Add all the necessary files to the List of files;
- Create the first watermark. Go to Settings → Edit operations → Add new and configure the watermark you'd like to apply to the first group of files;
- Go to Settings and export the current settings. In the top menu, click on Export and save the .ini file as "DF-settings 01.ini" somewhere on your computer;
- Select the first group of files (either by pressing and holding Shift and clicking the first and the last item or by pressing and holding Ctrl and clicking individual items);
- Right-click the first group of selected items and select Item settings…
- Choose the path to the settings file (.ini) – "DF-settings 01.ini" – and click OK;
- Go to Settings again, delete the first watermark and create the second one;
- Repeat the steps 3-7 but this time export the settings as "DF-settings 02.ini" and apply Item settings… to the second group of files.
Now the Custom settings column should indicate different settings next to different groups of files and DocuFreezer will apply different watermarks accordingly. Click the Start button to begin processing.

Q&A
How to watermark photos?
One of the easiest ways to watermark photos is to do it with DocuFreezer. With it, you can just use your own image watermark that will be put on multiple photos at once.
What is the best way to watermark a photo?
When adding a graphical watermark, it's a good idea to make it look subtle by lowering its opacity so that it is just barely visible. This will make it look less overwhelming – you want the viewers' attention to focus on the image but not the watermark. Many photographers find that 20-30 percent watermark opacity makes it not too intrusive but still visible. However, it really depends on your approach, and you should see what works best for you.
To make your watermark semi-transparent, find the Set opacity option in DocuFreezer Image watermark settings and change it within range of 0-100%.
Alternatively, you can set the opacity beforehand in another program. Open the file in any image or photo editor such as Inkscape or Photoshop and change its opacity (transparency) value, for example, to 30%.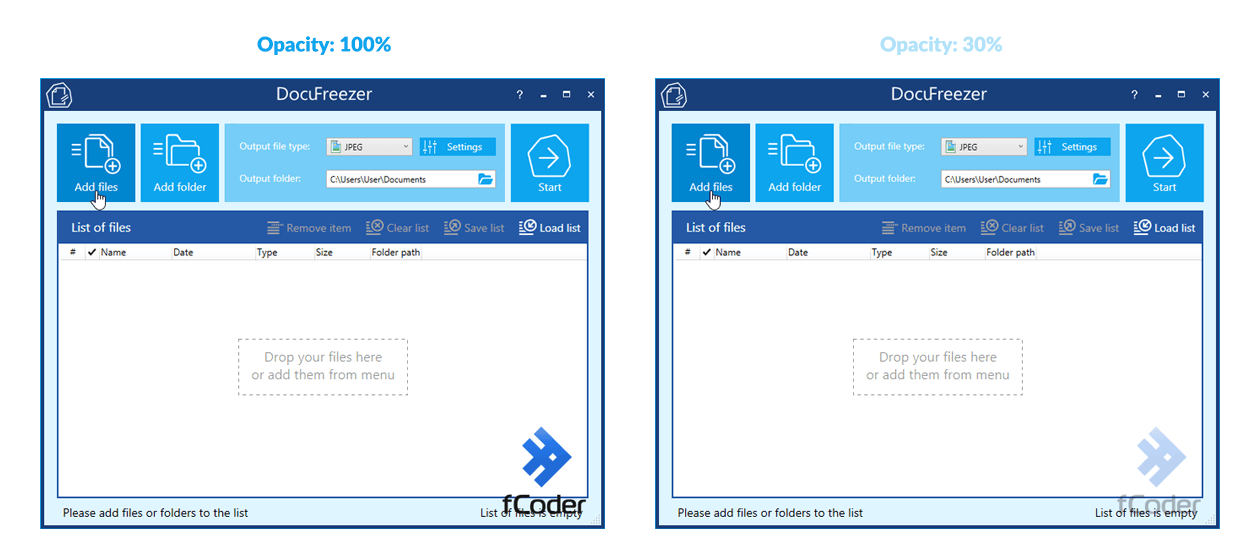
How to put a watermark on a photo without Photoshop?
Don't have Adobe Photoshop? No problem. You can add a watermark or logo to your work without expensive photo-editing software – if you have DocuFreezer. Adding a watermark to a photo can be done the same way as described above.
Should I watermark my photos?
Some photographers use watermarks, some don't. Maybe you want to upload your professional photos to social media, Etsy, Pinterest, or another website and you don't want someone to share your photographs online without due credit. Watermarking can be a quick and easy way to protect your photos or other content. Besides, you can use it for branding or self-promotion, making it easy for viewers to see who took that photo.
How to add a watermark to a PDF?
If you want to watermark a single PDF, use our instruction as described above. You can insert a premade logo (as image) or create a custom text.
How to automatically watermark documents when printing them?
If you want to set up automatic watermarking during batch printing, there's a simple tool to accomplish it. Try doing it with Print Conductor. With it, you can batch print documents, PDFs, or pictures and add text watermarks to them at the same time.
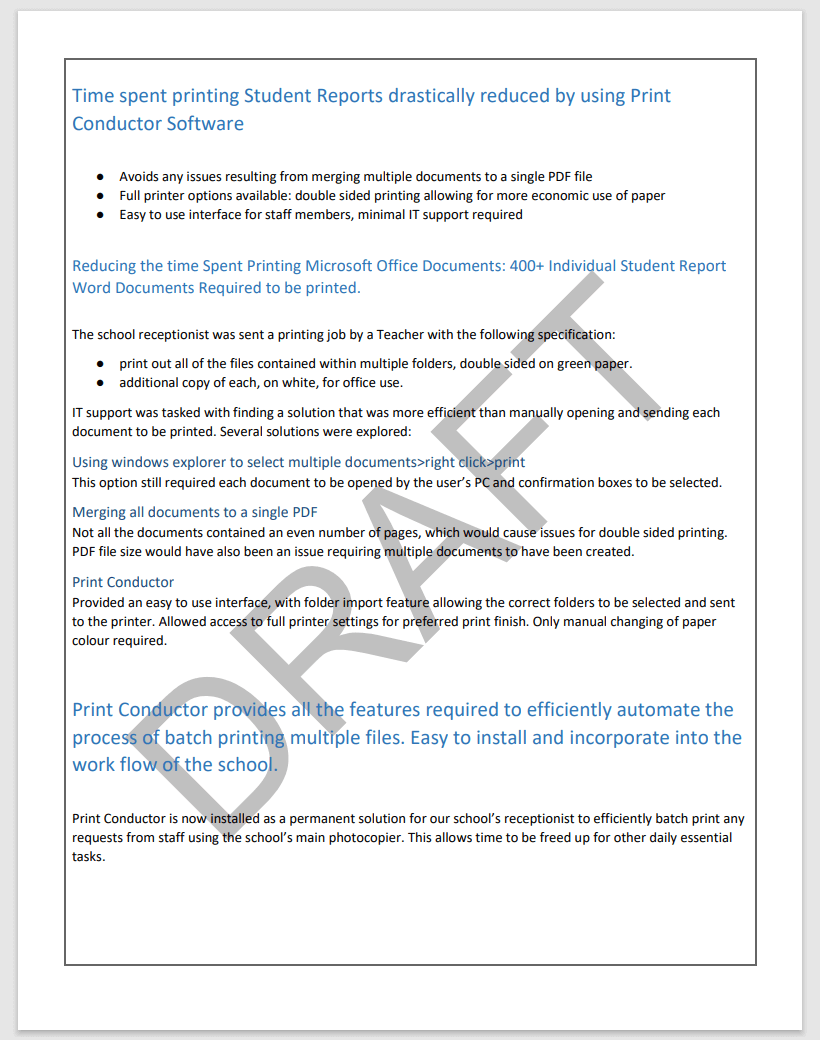
How to add a "Draft" or "Confidential" watermark?
In DocuFreezer, you can create and automatically add a "DRAFT", "DO NOT COPY", "CONFIDENTIAL" or any other text that you may have seen in Word's gallery of pre-configured watermarks. So if you don't have Microsoft Word or another software that can add full-page watermarks to document pages, DocuFreezer can be very handy.
- Add all the necessary documents to DocuFreezer
- Go to Settings → Edit operations
- Click Add new and choose Text watermark
- Type "DRAFT" or other desired text
- Use the configuration that you can see below:
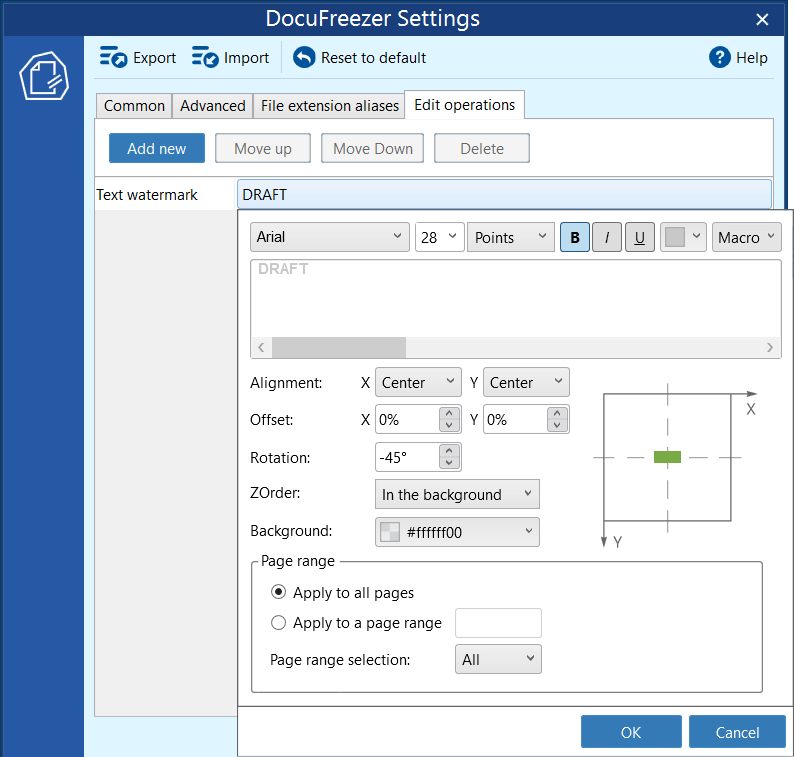
- Font: Arial, semibold
- Font size: 28
- Font color: Light-gray (#ffc0c0c0)
- Alignment: Center; Center
- Rotation: -45
- Background: Transparent (#00ffffff).
- Z-Order: In the background (so that the watermark appears behind the text)
Below is an example output PDF document created with these settings:
The trial version of DocuFreezer is available for free download. You can download the latest version and try watermarking your docs, scans, or photos with it by yourself.